前回、Firestoreから取得したデータを3カラムレイアウトで表示するところまで実装できたので、今回は、一覧画面から詳細画面へ遷移する実装をしてみる。
Expo + ReactNative + Firestoreで取得したデータを3カラムレイアウトで表示する
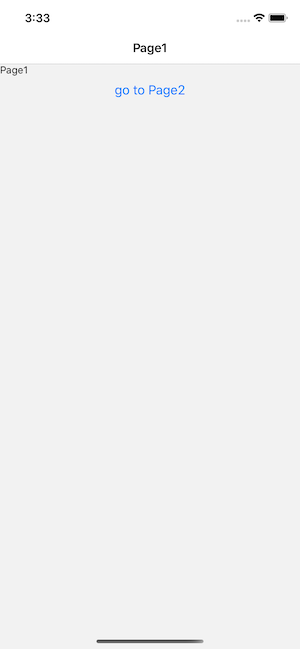
とりあえず画面遷移だけ実装
こちらのエントリを参考に実装してみた。
https://swallow-incubate.com/archives/blog/20191220
画面遷移に必要なパッケージをインストールする。expo installコマンドって知らんかったな。yarn addと何が違うのだろうか。
$ expo install react-navigation
$ expo install react-navigation-stack react-navigation-tabs react-native-gesture-handler react-native-reanimated
謎のエラーが出る。
Unable to resolve "react-native-safe-area-context" from "node_modules/react-navigation-stack/lib/module/vendor/views/Stack/StackView.js"
Failed building JavaScript bundle.
Unable to resolve "react-native-safe-area-context" from "node_modules/react-navigation-stack/lib/module/vendor/views/Stack/StackView.js"
Failed building JavaScript bundle.
どうやら他に必要なパッケージがあるらしいのでインストールする。特に意味はないけど、expo installじゃなくてyarn addにしてみた(特に問題はなかった)。
$ yarn add react-native-safe-area-context
$ yarn add @react-native-community/masked-view
こんな感じソース構成。
.
├── App.tsx
├── app.json
├── assets
├── babel.config.js
├── firebase.js
├── node_modules
├── package.json
├── screens
│   ├── Page1.js
│   └── Page2.js
├── tsconfig.json
└── yarn.lock
App.tsx
import React, { Component } from 'react';
import { createAppContainer } from 'react-navigation';
import { createStackNavigator } from 'react-navigation-stack';
import Page1Screen from './screens/Page1';
import Page2Screen from './screens/Page2';

const MainStack = createStackNavigator(
  {
    Page1: Page1Screen,
    Page2: Page2Screen,
  }
)

const AppContainer = createAppContainer(MainStack)

export default class App extends Component {
  render() {
    return (
      <AppContainer />
    )
  }
}
Page1.js
import React, { Component } from 'react';
import {
  Text,View,Button
} from 'react-native';

export default class Page1Screen extends Component {
  render() {
    return (
      <View>
        <Text>Page1</Text>
        <Button
          title="go to Page2"
          onPress={() => {
            this.props.navigation.navigate('Page2')
          }}
        />
      </View>
    )
  }
}
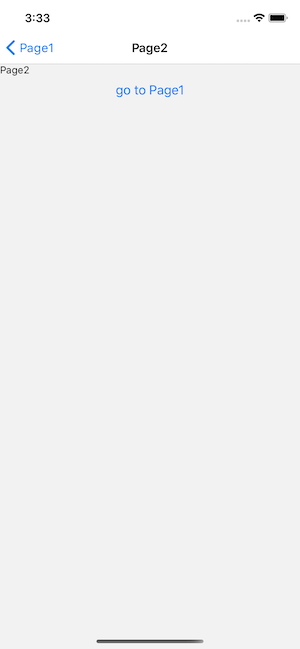
Page2.js
import React, { Component } from 'react';
import {
  Text,View,Button
} from 'react-native';

export default class Page1Screen extends Component {
  render() {
    return (
      <View>
        <Text>Page2</Text>
        <Button
          title="go to Page1"
          onPress={() => {
            this.props.navigation.navigate('Page1')
          }}
        />
      </View>
    )
  }
}
出来た。
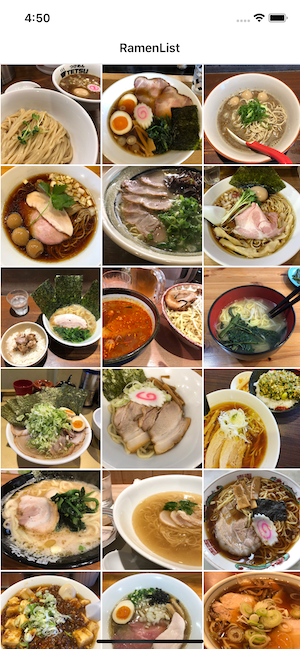
ラーメン一覧から詳細画面に遷移する
画面遷移のやり方が分かったので、ラーメンアプリに組み込んでいく。
App.tsx
import React, { Component } from 'react';
import { createAppContainer } from 'react-navigation';
import { createStackNavigator } from 'react-navigation-stack';
import RamenList from './screens/RamenList';
import RamenShow from './screens/RamenShow';

const MainStack = createStackNavigator(
  {
    RamenList: RamenList,
    RamenShow: RamenShow,
  }
)

const AppContainer = createAppContainer(MainStack)

export default class App extends Component {
  render() {
    return (
      <AppContainer />
    )
  }
}
RamenList.tsx
TypeScriptまだ理解出来ていないんだけど、取得してきたRamenのオブジェクトにinterfaceを割り当ててみた。
画面間での値の受け渡しは、navigateメソッドの引数に渡して、paramsから取得する方式にした。他にもいくつかやり方があるみたい。
import React, { Component } from 'react';
import { StyleSheet, Button, Text, View, Dimensions, TouchableHighlight } from 'react-native';
import { Image, FlatList} from "react-native";
import { Container, Header } from 'native-base';
import db from '../firebase';

interface Ramen {
  imageUrl: String
  body: String
}

export default class RamenList extends Component {
  state = { ramens: Array<Ramen>() };

  componentDidMount() {
    db.collection("ramens").get().then((querySnapshot: any) => {
      const ramens = querySnapshot.docs.map((doc: any) => doc.data() as Ramen)
      this.setState({ ramens: ramens })
    });
  }

  render() {
    return (
      <Container>
        <FlatList
          data={this.state.ramens}
          renderItem={({ item }) => (
            <View>
              <TouchableHighlight onPress={() => this.props.navigation.navigate('RamenShow', item)}>
                <Image
                  source={{ uri: item.imageUrl }}
                  style={styles.imageStyle}
                  />
                </TouchableHighlight>
            </View>
          )}
          numColumns={3}
          keyExtractor={(item, index) => index.toString()}
        />
      </Container>
    );
  }
}

const windowWidth = Dimensions.get('window').width;
const styles = StyleSheet.create({
  container: {
    flex: 1,
    backgroundColor: '#fff',
    alignItems: 'center',
    justifyContent: 'center',
  },
  imageStyle: {
    width: windowWidth / 3,
    height: windowWidth / 3,
    margin: 1,
    resizeMode: 'cover',
  }
});
RamenShow.tsx
import React, { Component } from 'react';
import {
  Text,View,Button, Image, StyleSheet
} from 'react-native';

export default class RamenShow extends Component {
  render() {
    return (
      <View>
        <Image
            source={{ uri: this.props.navigation.state.params.imageUrl }}
            style={styles.image}
        />
        <Text>{ this.props.navigation.state.params.body }</Text>
      </View>
    )
  }
}

const styles = StyleSheet.create({
    image: {
      width: null,
      height: 400,
      resizeMode: 'cover'
    }
});
できたあああああ!